Thursday, December 30, 2010

Christmas Morning (or any morning) Frittata

Hey folks!
I thought I'd rustle up a few photos I had from cooking on Christmas morning to share with you. After opening gifts and sipping coffee, my family and I banded together to make a delicious breakfast :) YUM. My sister decided that a frittata would be a great dish to have.
So, here is a rough recipe of what we did:


Christmas Morning (or any morning) Frittata

We enjoyed this frittata on a special occasion but there is no reason that you can't try this recipe out any day of the year! It's actually a wonderful thing to make for brunch, and it can feed a lot of people!

You'll need: (for a very large frittata)
1 dozen eggs
2-3 tbs milk
1 C shredded cheese (shredded cheddar is good)
1 tbs butter
1 tbs olive oil
2-3 red potatoes 
1/2 large onion
1 red bell pepper
8 oz mushrooms

First, wash and chop the red potatoes into small cubes. Put a large cast iron skillet onto the stove, add the butter and olive oil, and let it heat up over medium/high heat. Then, add the potatoes... they take the longest to cook. While the potatoes are cooking, chop the red pepper, and onion into small pieces and set aside. Do the same with the mushrooms. Once the potatoes have cooked a bit, add the red pepper and onion (you might want to lower the head just a tad) Make sure to salt and pepper liberally. Cook the veggies down until the onions are translucent and the potatoes are fork tender.
While the veggies are cooking, crack all of the eggs into a bowl and whisk them together. Add salt, pepper, and the milk, and whisk again. The milk helps the eggs to be light and fluffy (yay!) Now add 1/2 of the shredded cheese and give it a little stir.

Next, add the mushrooms to the veggie mixture on the stove and cook those down a bit. The reason these are added last is because they cook the fastest and are easy to overcook... they also can release a lot of water if overcooked so you don't want to water down your veggies! Once the mushrooms are soft, give the egg mixture a good stir and pour it right into the cast iron skillet on top of the veggies. Now, don't mess with it. Leave it on medium/low heat and let it cook for a while. The goal is to get the eggs cooked almost all the way through without burning. While you're waiting for that, turn the broiler on high.

Once the eggs are almost all the way cooked (the top will still be jiggly and liquidy) sprinkle the remaining cheese on top and put the whole thing into the broiler. Leave it in there until the top is golden brown and it is totally cooked. My sister's stayed in there for about five minutes. After its all broiled up, take it out, cut it right in the skillet and serve up!


food coma breakfast

It was delicious and kept us all full until dinner! I hope you feel inspired to try this recipe (it was reeeaaaalllllyyy good!) For those of you I won't see (or haven't had the pleasure to meet) I hope you have a wonderful new year!


Foodie foodie!


Feel free to leave any questions or comments! I love hearing from you!

Sunday, December 26, 2010

Christmas Baked Beans


Well hello there my foodie minions! I hope you've been enjoying the holiday numnums like I have! The holidays are a time for family, fun, and of course, food. As I pledged before, I have been diligently trying my best to keep a balanced diet through these times of gingerbread men and eggnog. I do, however, strongly believe in celebration, and Christmas is it my friends! Eating healthily through the holidays is quite a challenge, as I'm sure you know. The key, I think, is to reserve your most gluttonous eating tendencies for the actual holiday itself.  Eating your body weight in chocolate truffles on the days between just won't do!

Anyways, for the holidays, my family normally does the potluck thing- everyone contributes something yummy and we all gather together to enjoy. My sister had previously made these baked beans for another occasion, and I liked them so much that I had to try it for myself! I healthy-fied the recipe just a little bit but substituting some fatty ingredients for more healthy ones and tweaking little things here and there, but all in all my batch of baked beans turned out wonderfully (if I do say so myself)

Christmas (or whenever else) Baked Beans

You'll need:
6-8 slices turkey bacon
1 tbs olive oil 
1 large red onion
1 clove garlic
1/4 c red wine
1 can white kidney beans
1 can pinto beans
1 can red kidney beans
1 can garbanzo beans
2/3 C ketchup
1/3 C molasses
1/4 C light brown sugar
3 tbs Worcestershire sauce
2 tsp dijon mustard
1 1/2 tsp liquid smoke
salt and pepper


First, preheat the oven to 375º. Get a cookie/baking sheet, line it with foil, and place a rack onto the prepared baking sheet. Then, put the bacon slices onto the rack and put them into the oven until they are toasty brown around the edges. I prefer to cook bacon this way for a few reasons. First of all, if any of you have ever been splattered by bacon grease, you simultaneously think HOW DARE YOU, YOU STUPID BACON!? and maybe this bacon is trying to say "don't eat me!!!!" Even if you don't specifically have this thought process, getting splattered by bacon sucks.. and it's just another thing on the stove that crowds up the place. So, moral of the story- roast the bacon! It's easy, normally pretty quick, and painless. When the bacon is done, remove it from the oven (but don't turn the oven off!) and set aside.

Next, chop the red onion into fairly small pieces. Once you've got that done, put a skillet onto the stove over medium heat and drizzle the olive oil into it while it heats up. When it is good and hot, cook the onions until they are soft and a little translucent. Remember to salt and pepper liberally at this point! About halfway through the onion cooking process add the red wine, mince the garlic clove, and add to the pan. You add the garlic halfway because (in my experience) it tends to burn quickly- and the flavor/smell of burnt garlic is not yum foodie foodie...

Once you've got the onion/garlic all done, remove the skillet from the heat and set is aside. Then, drain all the of cans of beans (except the baked beans) and place them into a dutch oven/oven-safe vessel. Then, add the ketchup, molasses, brown sugar, Worcestershire, dijon, and liquid smoke... and mix it all up! Add the onion/garlic and add some pepper. Next, chop/crumble the bacon into small pieces and add it into the mix. Note: normally at this point I would tel you to "salt and pepper liberally" but the bacon that you've just added has a good amount of salt, so be careful not to oversalt! Give it one more good stir, cover, and stick it into the preheated oven.  Let the oven work its magic for at least 50 minutes, but you can leave it in there for as long as an hour and a half. My family and I prefer our baked beans to be a bit softer and "stewey", so we leave it in the oven a bit longer. It is, however, perfectly delicious after 50 minutes. Dish it out and enjoy!


I hope you all had a wonderful winter holiday! More foodie foodie to come.


Foodie foodie!


leave a little love
gimme a comment :) 

Wednesday, December 22, 2010

Holiday Gingerbread Muffins

Hello lovelies! I was browsing through some of my pictures and realized that I'd totally forgotten to tell you about the gingerbread muffins I made for finals week! So, here we go!

On the Sunday night before finals week, I thought "well... Monday's normally suck pretty badly in the first place... but tomorrow is going to suck even moooooorreee! Finals start!" So, obviously, it would have been criminal to start the week without muffins (ugh! preposterous!) Someone in the studio had requested gingerbread muffins, so it was perfect: our last week before our holiday break and we needed a powerhouse Muffin Monday to get us through the trauma of finals week. Double-whammy.


Orange Gingerbread Muffins

I found this recipe on epicurious.com and made some adjustments and fine tuning. Here we go!


You'll need:
2 2/3c flour
1 tbs baking soda
1 tsp baking powder
1 1/2 tbs ground ginger
1 tsp cinnamon
1/4 tsp ground cloves
1/8 tsp ground nutmeg
1/2 tsp salt
1 stick of salted butter (soft–but not melted– or at room temp)
1/2 C sugar
2 eggs
2/3 C dark molasses
1/2 tsp vanilla extract
1 C water
3 tbs orange juice (fresh squeeze it!)
1 tsp sugar


First, preheat the oven to 350º and put muffin papers into a muffin baking pan. Then, whisk together the flour, baking soda, baking powder, ginger, cinnamon, cloves, nutmeg, and salt. Set it aside. 


Now, take out your stand mixer or hand mixer (I used a hand mixer) and cream the butter and sugar together. Just a little reminder about the butter: it's better to leave it out beforehand if you know you're going to be baking... but if you're a bit forgetful like me and forget to leave it out, just pop it in the microwave–but beware! Don't let it get too soft in there and melt, because it could cause the consistency of the batter to turn out all wrong. You should aim for a stick of butter that is very very easy to mush when you touch it, but hasn't begun to melt yet. So, after you've gotten that all mixed in together, add the eggs one at a time. I've been told to try and get the eggs to room temperature too, but like I said, I'm forgetful. Normally I leave the eggs in a little bowl of hot/warm water while I'm mixing up all the dry ingredients and such, just to give them a little nudge toward room temp. After the eggs are all beaten in, then add the molasses and vanilla. (Quick tip: add a teensy but of vegetable oil to the measuring cup and swirl it around before the molasses goes in. It'll make pouring the molasses back out a lot faster and easier) 
Next, you'll add the dry ingredients into the wet ingredients in three parts (add a third, mix, add another third, mix... you get the picture...) Then you'll gradually add the water until it goes from looking like:


<--- This
               

                       To this! ------>


Horray! Now, fill your muffin papers 3/4 full and pop those babies into the oven! The original recipe that I read suggested that you bake these muffins for 25 minutes, but like I always say learn your oven! Mine were all good to go in 17 minutes! Big difference, huh?! It's good to keep a watchful eye when you're doing your first round of muffins– just to make sure they aren't getting too terribly toasty...


While those are baking, take the orange juice and stick into the microwave just for about 20 seconds or so. You just want to warm it up just a little. Then, add the sugar into the juice and mix it up until the sugar is dissolved. When the muffins are finished baking, take them out of the pan and place them onto a rack/towel/counter/whatever. While they're still warm, spoon a little bit of the orange juice mixture onto the top of the muffin and let it sink in. Horrah! Now, just let them cool off, stick them in a container, and bring them to your very excited coworkers!

Foodie foodie! 

I hope you all have a wonderful, safe, and yummy holiday! More to come soon :)

Friday, December 17, 2010

You know you're an addict when...


For those of you who know me personally, chances are that you have rarely (if ever) encountered me without the accompaniment of some form of coffee. Normally I cart it around in an insulated Klean Kanteen...

At any given moment, it is almost guaranteed that I'm highly caffeinated...
Including right now.

So, I thought that I'd give you a little walk-through of all of the different coffee-making devices that inhabit my kitchen. I figured it'd be kind of fun to show you my absurd level of enchantment with coffee–plus, if you're looking into buying a new coffee making device in the future, this may help you out!


Number One: The Drip Coffee-Maker

strength level:low–med/high
My my... how original and exotic! (har har) This one isn't really that exciting or interesting but it's a staple in my coffee drinking habits, so I really must include it.
This is just a standard coffee maker. It's a 12-cupper, uses paper cone filters, and brews coffee best when it's ground medium or medium/fine. What do I like about it? It makes 12 cups of coffee... which I can certainly put away on my own... Also, it is amazingly low maintenance. Pour the right amount of water in, put some grinds into a filter, and press on. There is no stove or boiling water involved, no extra steps, just turn on the power button, walk off for a few minutes, then come back and the coffee is waiting–all toasty warm from the hotplate built into it. What can I say? It's a standard in any coffee drinker's kitchen. Depending on the water to coffee ratio, it can brew very mild or very strong coffee. If you don't have one, it would be wise to get one.


Number Two: French Press

strength level: med/high
Now it gets a bit more interesting. This is my handy-dandy French press. For those coffee drinkers that have not ventured much past the typical drip coffee maker, and are looking for a bit of adventure, look no further. This is how you use it: First, pull out the top and put the appropriate amount of very coarsely ground coffee into the French press. I normally put about a tablespoon per cup but it can be adjusted to taste. Once the water has come to a boil, pour it into the French press (right into the grinds) until it fills to about an inch from the top. Then, replace the lid (with attached plunger-filter) on top, letting the circular filter sit right on top of the water level. Let it sit anywhere from three to five minutes (depends on how strong you like it). Then, push the handle of the plunger-filter downward until it forces all of the floating coffee grinds to the bottom–and pour yourself a cup! This coffee tends to be a stronger than that which comes from standard drip coffee machines, and there is a bit of coffee sludge (for lack of a more appealing word) left at the bottom of the cup. This is normal, and I personally don't mind it, but normally avoid drinking it.


Number Three: Stove-top Espresso Maker

Strength level: high
Espresso. Say it with me: "ESS-PRESS-OH"  None of that "eX-presso" stuff... It's espresso! Having a stove-top espresso maker is awesome, and turns out, is popular in other countries. If you aren't into the idea of investing in a pressurized steam espresso machine, this is what you want. It comes in all different sizes, is generally made of aluminum (so no dishwasher!) and works best on range stove with an open flame, rather than an electric stove. The whole thing consists of three chambers. What you do is dismantle it by twisting the chambers free from each other. Fill the bottom chamber with water, (normally there is a pressure gauge that marks the maximum amount of water that can be put in) fill the middle filter chamber with coffee grinds, and then screw it all back together. Then, put it onto the stove over low to medium heat, and just wait. You'll begin to hear a hissing noise, which is normal. What happens is the water of the bottom boils, creating steam that passes through the coffee. The result is a concentrated coffee product that passes through a chimney-type passage into the top, where it will happily wait for you to pour it into a little porcelain cup and enjoy. This espresso is comparable in strength to that you would purchase at an espresso bar, but is a bit different. Espresso that is pulled from a pressurized espresso machine has three parts: the heart, the body, and crema. This brewing device produces espresso that does not have these three distinct parts- but it is oh-so-good.  It is much more affordable than a pressurized espresso machine, and though I'm sure there is some preference to how coarse the grind is, works with any grind of coffee. Bravo.


Number Four: Pressurized Espresso Maker

Strength level: high
Yes... yes. Glorious. I absolutely love having this espresso machine. My parents gave it to me for my 18th birthday, and I adore it! This is basically the mini version of the espresso machines you'll find at your local cafes... although, the ones you find at cafes cost thousands of dollars and are much much much more sophisticated than my little steam-buddy. It uses a lot more pressure than the stove-top espresso maker, and mine has a little reservoir that it uses to make the steam. It also has a little steamer wand that you can use to froth milk if you want to make cappuccinos or lattes.  I like it a lot because is has all the parts of the espresso machines from coffee shops, and mine pulls a double shot as a default (all the more reason for me to drink more!) Like I said before, espresso shots pulled from this type of machine have three parts: the heart, the body, and the crema. The heart is the darkest and deepest part of the espresso, located at the very bottom of the shot. The body is the largest part and it hovers in the middle between the heart and the crema. The crema is that little bit of foam located on top of the shot that indicates that you've pulled a good espresso. In some of my research about coffee, I read that these shots technically have a shelf life of about 10 seconds before all the parts meld together and the taste is compromised. So, espresso shots alone are not meant to be sipped over time, they're meant to be pounded right on the spot! You can, of course, add milk or cream to your liking (at this point, I just forget about the ten second rule) The coffee is very strong, and very yummy. The only thing I do not like about this coffee making device is that it is terribly irritating to clean. Technically, you should purchase specific espresso machine detergent and run it through the system in order to clean it all out. You also have to clean the steam wand, portafilter, and tray that catches excess coffee/water/milk/whatever. Maybe it's me just being lazy, but whatever. Coffee shouldn't be a pain in the butt... it should be glorious. End of story.


Other tools and tips:

Other things that are good to have in your coffee-making kitchen are:

A coffee grinder: I prefer a burr grinder, rather than a grinder with blades. Burr binders provide a more consistent grind of coffee than the blade grinders. Having a coffee grinder really reduces the trips to the grocery store grinder and allows you to grind your beans fresh right before you brew, which improves the taste for those of you with sensitive pallets.

Espresso Shot glasses: Set aside a shot glass or two that are used only for coffee. Using the one you used on Saturday night for your tequila shooters may compromise the taste.

Frothing Pitcher: if you want an espresso machine with the steam wand, you'll want one of these.

Tips: If you aren't sure where to start, but want to explore coffee a bit more that you already do, my advice is to talk to a barista. Most people don't know the composition of every drink on the menu of an espresso bar, and most of the time, baristas are happy to help. If you want to know what a café olé is (drip coffee topped off with steamed milk) ask your barista... and I'm not talking Starbucks baristas. No offense to the hardworking employees of Starbucks, but most of that stuff is automated... plus every time I walk by a Starbucks, they look so crowded that hanging out and asking them questions might get in the way of them serving all of their anxiously waiting customers. Knowing what kind of drinks you like will help you know what device to use.


Well, I hope you've enjoyed my examination of my addiction to coffee. You know you're an addict when you have four different kinds of coffee brewing in your apartment... and you use them all at least a few times a week... some even more than once in a day! haha! If you have any questions or comments, please don't hesitate to drop a comment (@ the bottom of this post, click comments)


Foodie Foodie!

Thursday, December 16, 2010

I'm back!

Whew! Final are over, essays are written, and projects are finished! Hurray!
I promise you, I haven't been living off of fast food or frozen dinners... even in times of extreme all night studying, I still try my veerrry best to eat yum foodie foodie.

Often during my nights elbows-deep in textbooks, taking a break to make dinner is very entirely therapeutic.  Cooking has nothing to do with a 50 pound text book, it is driven my intuition (sometimes), and I feel almost immediate satisfaction from taking raw materials and turning it into something yum-licious.

Lately, I've been a little obsessed with using an oven. Putting something into a cooking vessel and popping it into the oven is kind of fun, it's almost a bit of a surprise when you open it up and find what the magic of the oven has produced.
So, here is a little something that I made in the midst of studying for my terrifying history of graphic design final.

Chicken and Veggies en Papillote 
This is chicken roasted in a parchment paper bag!  I had a lot of ingredients leftover from one of my previous meals (rosemary food coma...) so I found myself hoping to use an oven on them.. but I didn't want to use a dutch oven again! I wanted to try a different method. So, I took this approach that creates little individual servings! Here we go:

You'll need: (for 2 servings)
2 boneless skinless chicken breasts
1 zucchini
1/2 C. potatoes (rough chop)
1/2 C. mushrooms (rough chop)
1/2 onion, chopped
2 stalks of celery
2 large sheets of parchment paper
olive oil
garlic salt
pepper


Preheat the oven to 375º.
Chop the zucchini, potatoes, mushrooms, onion, and celery.
Do your very best to chop them into even sizes. The veggies will have a lot of interaction with steam in this cooking process, so it's good to roughly chop them on the larger side. Mine ended up being about 1/2" thick, but you can guesstimate. Put all of your chopped veggies into a bowl, and toss with a good amount of olive oil, garlic salt, and pepper. Now would be a good time to add any additional seasoning if you'd like. I wanted to keep it simple, but feel free to experiment. Rosemary, thyme, or even a little dried basil would be good if you care to try.
Next, get a cookie/baking sheet out, lay the parchment paper on top, and then put the chicken breast on top of that. Salt and pepper both sides liberally. Next, you'll pile some of the veggies on top of the chicken. Keep in mind, that you will eventually be making a little pouch out of this parchment paper, so try not to overload it too terribly much. Now, take two sides and lift them up to meet directly above the chicken/veggies. Fold the ends together two or three times, or just until it is secure. Then, take the other two open ends, and fold them underneath, so it'll look like this:


Woohoo! Good job...
Repeat this for the other servings (however many you choose to do). I ended up with extra veggies, so I made another little bag with just veggies. Now, just pop this into the oven and let it work its magic. 


Put this into the oven for 20–25 minutes, it all depends on your oven. Come to think of it, I think mine only stayed in there for about 18 minutes. Like I said, it all depends on your oven. After your waiting time is up, take the little yum-packets out of the oven, open up, and NOM NOM NOM NOOMM


well hello beautiful!


Foodie Foodie!


Sunday, December 12, 2010

EEK!

Hello foodie foodies,
I'm sorry I've been neglecting you– like I said before, it's time for FINAL EXAMS here at Chico State, so unfortunately I won't have too much downtime to tell you about the culinary explorations that have been going on lately. But don't worry! More foodie foodie is on the way, I promise.

I can, however, take this opportunity to tell you that I'd love to take your requests, answer your questions, or just see your comments! I can't guarantee that I'll get to every request... but I'll try!

Wish me luck on my finals! More foodie foodie to come. 


foodie foodie!

Thursday, December 9, 2010

whoah brownies!

So, we're coming pretty close to final exam time here at Chico State, a time when students guzzle energy drinks, stay up all night, eat junk food due to lack of time (or energy) to cook, AND endure copious amounts of stressss. Yes. Stress.


And what do some of us do when we're stressed?

Eat.

Yup, it's true. Sad as it is, the more stressed out we get, the more spherical we become. And that on its own is enough to stress about!
I always try to discourage myself from stress-eating, and if I do feel the ever seductive call of "eaaatt meeee!!!" from some sweet treat during times of duress, I do my best to keep it healthy...which leads to my latest solution and newest review:


Trader Joe's Reduced Guilt Fat Free Brownie Mix:
A fat free brownie that's light in calories and light on guilt? Can it be?!
Well foodie foodies, yes. Yes it can.
I love this product because it requires virtually NO prep time and very few ingredients. What you see in the above picture is literally all you need! The box of brownie mix, one 6 oz. container of fat free vanilla yogurt, a bowl/spatula to mix it up, and an 8x8" baking pan! Really easy guys...

You just combine the brownie mix with the yogurt and mix it... 


from looking like this...
to looking like this!

Horrah! Now, pour that into the baking dish, (I sprayed a little non-stick baking spray before... just for good measure) stick it into your oven at 350º, and endure the directed baking time (I can't remember how long mine took... just look on the box!) and ta da!
  
My rating for this delectable morsel? 8.75 out of 10. Why is that? Well, I couldn't bring myself to give it a 9... though I may change my mind later. Though this brownie is amazingly chocolate-y and satisfying, it does have a bit of a chewy texture for a brownie... and I normally prefer my fresh baked brownies to be a bit softer. But other than that, they're amaaaaazing
So, cut yourself a brownie and enjoy! I gave Brian a scoop of ice cream on top of his... and I may or may not have put a teensy bit on my brownie too :) Hey, it was really satisfying... and when you're craving something chocolaty and amazing- nothing short of really satisfying will do! 

Foodie Foodie!

the wreckage...
 

Monday, December 6, 2010

Rosemary Food-Coma

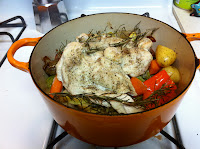
This Thanksgiving break, while I was home visiting my family, they told me (to my GREAT joy) that I could borrow their little dutch oven. Granted, it isn't technically dutch oven, as in... you can't stick it on top of a camp fire and it doesn't have a lip on the lid, but it is an enameled cast iron pot. Horray! Why horray? Well, you can stick it in the oven. Something I certainly cannot do with my other cookware, and the thought of simply putting raw materials into a pot and having it emerge from the oven all amazing and yummy was quite exhilarating.. I had to try it. Plus I really wanted to make something soothing and comforting to combat the cold weather. On top of it all, it ended up being a wonderful source of leftovers. Hello lunch for the studio!

Rosemary Food Coma
You'll need:
2-4 carrots
1 red bell pepper
3 stalks of celery
1-2 yellow Italian squashes (or you can use zucchini)
4-6 sprigs of Rosemary
1 C. whole mushrooms
about 1 lb of potatoes (I used fingerling heirlooms)
1 small yellow onion
1 clove garlic
2-3 boneless skinless chicken breasts (it depends on how many you're serving)
Garlic Salt/Pepper
Olive oil
1/2 C white wine 

Preheat the oven to 450° and put the dutch oven into the oven to preheat. 
Chop the carrots, pepper, celery, squashes, mushrooms, onion and potatoes. Cut them into fairly uniform sizes so that they'll cook evenly. I ended up leaving the mushrooms whole and just cutting the rest of the veggies to be about the same size. Finely chop the garlic, put them all into a bowl, and toss them with a liberal amount of olive oil, garlic salt, and pepper. Next, remove the dutch oven from the oven (use oven mitts! It sounds like common sense, but for some reason, my little dutch oven looked so innocent sitting there waiting for vegetables... but really it was searing hot!)
Put the veggies into the dutch oven and pause to enjoy the satisfying sizzling noise that it should make :) Lay half of the rosemary on top of the layer of veggies.  Then, salt and pepper both sides of the chicken breasts and lay them on top of the rosemary. Then, you'll lay the other half of the rosemary on top of the chicken. Now, place the lid on top of the dutch oven, and put it into the oven for 35-45 minutes (depending on how hot your oven actually runs) 15 minutes into the cooking time, add the white wine. When it emerges from the oven, it will fill your teensy apartment (or at least your kitchen) with the lovely scent of rosemary magic. The veggies should be fork-tender, the chick should be cooked through, and there should be a fair amount of delicious broth lingering in the bottom of the dutch oven. Remove the rosemary, cut the chicken into bite-sized pieces, plate it with some veggies, and add a few spoonfulls of the yum yum broth on top. Then, succumb to the following rosemary food coma glory. 

Yum Foodie Foodie!


Thursday, December 2, 2010

Weeknight Dinner #3

Hello there nom-nomers!
I apologize for the absence of foodie foodie recipes lately, I've been very busy with school. Luckly the semester is almost over, so starting mid December, you'll be getting a lot more foodie foodie from me! (hopefully, at least)

So, I had a sudden realization the other day as I was stuffing my face with leftover turkey: I realized that during the holidays, people gain weight not just because of the feasts that ensue during Thanksgiving, Christmas (or Hanukkah or Kwanza or Winter Solstice) and New Years. We gain weight during the holiday season because in the days in between the big ones, we continue to stuff our faces like every day is a friggen holiday! We're in Thanksgiving mode from November 24th all the way to the New Year, when we make resolutions to drop all the weight that we just gained. So: I put my foot down and decided to make a Thanksgiving(ish) resolution: THIS YEAR, I WOULD MAINTAIN A HEALTHY AND BALANCED DIET THROUGHOUT THE HOLIDAYS. It's unhealthy to stuff your face to all oblivion, and just because the holiday season is full of sweet goodies, doesn't mean they should be the main component of our day-to-day diets. Don't get me wrong, I love gingerbread and hot chocolate even more than the next person, but I strongly believe in moderation.

So, in attempts to keep a balanced diet, I put together a little weeknight dinner that is low in fat/calories and high in yum yum yum oh-mah-god-that-was-good satisfaction:

Shrimp & Veggies with Warm Polenta
For those of you who aren't familiar with polenta, all you really need to know is that it is made up of ground up yellow corn, can be bought in several forms, and is magically delicious (not in the Lucky Charms kind of way...)

Also, for this recipe, I used frozen pre-cooked shrimp because I couldn't find any raw shrimp when I was at the store. I would recommend using raw, no-tail, and de-veined shrimp. just make sure that you cook the shrimp all the way through.


You'll need:
One pack of pre-cooked polenta
2 carrots
1 C chopped mushrooms
1 red onion, cut into slices
1 clove garlic
Shrimp (I estimated just about 1/2C–1C per person depending on how hungry you are)
1/2 C white wine (or chicken broth)
Olive oil
Salt and pepper

Chop up the carrots, mushrooms, onion, and garlic. Put a little olive oil into a saute pan over medium heat and toss in the onions and mushrooms. Salt and pepper liberally.

While that's cooking away, put a about an inch and a half of water into a pot to boil with a steamer insert. Cover and steam the carrots for a few minutes until they're just fork tender. Then, add them into the saute pan. Add the white wine, more salt and pepper, and garlic into the pan and let it reduce down.


Next, take either a grill pan or another saute pan and put it on over high heat. Put a teensy bit of olive oil into the pan and let it heat up. Open up the polenta and cut it into polenta-pucks (har har.) Mine were about 3/4" thick. Salt and pepper each side and place them into the hot pan. Let them cook on each side until they are nice and toasty golden brown on each side. 


While you're waiting for the polenta to brown, toss the shrimp into the pan with the veggies. Saute until they're warmed through (if you're using pre cooked, but if you're using raw shrimp, cook until they are pink and not raw inside.)
if you're using pre-cooked shrimp, be really careful not to overcook them


When the polenta is toasty on each side and the shrimp/veggies are all warm and yummy, plate them up and nom nom nom nom nom nom


I loved this meal because it is hearty without being heavy! Horray!

Foodie Foodie!