Showing posts with label Weeknight dinner. Show all posts

Sunday, March 6, 2011

boy[friend]food

[heart-shaped pretzel]

Boyfood. In my case, boyfriendfood. Well, if you've got a boyfriend like mine, then you know that some couples have very different eating habits. For me, I'm all about the healthy, low[ish] carb (only when I'm not too lazy to cut carbs...) foods. For him, bring on the pasta, garlic bread, pizza... the list goes on. So, imagine my disgruntlement as I set out to cook dinner for us both. What do I do? Not to worry healthy foodies. There is a way.
Normally I find myself making two different dishes by using a few common ingredients. Tonight was no exception. I made Brian a tortilla BBQ chicken pizza and a salad for myself. Before you go throwing a hissy-fit let me just say, the salad was quite good. I certainly don't feel like I miss out much while I sit and chew my salad as Brian chows down on pizza. After all, what kind of girlfriend would I be if I didn't steal a bite?

Brian's BBQ Chicken Pizza

You'll need:
(2 pizzas)

2 medium sized tortillas
about 4 oz of chicken breast
3 tsp steak seasoning
(I used Chico Spice Co. Garlic and Pepper)
1/2 green bell pepper
1/2 red onion
1/2 C shredded mozzeralla
1/3 C shredded pepperjack
4 tbs BBQ sauce

Start by preheating the oven to 400º. Line a large baking sheet with a piece of parchment paper. Place the raw chicken into a plastic zip top bag and add the steak seasoning to it. If you are a Chico local, I recommend using Chico Spice Co.'s Garlic and Pepper meat seasoning, I bought it from the Saturday farmers' market. If you don't have access to this, your favorite steak seasoning will be just fine. Seal and shake the bag until the chicken is covered. Put this bag into the refrigerator. Next, do the prep work. Chop the onion and pepper into small pieces and put the two tortillas flat onto the baking sheet. 

Pour a small amount of olive oil onto a nonstick pan over medium-high heat. Let the oil heat up a little and then place the chicken on the pan. Brown on both sides until cooked through. Take it off the heat and set aside. While the chicken is cooling, spread 3 tbs of BBQ sauce onto the tortillas. Then, put the cheese on and the peppers/onions. 
The chicken should be cool enough not to cook your fingertips, so chop/tear the chicken into small bits (so it looks like "pulled chicken"). Place the chicken into a bowl, add the remaining 1 tbs of bbq sauce, and stir around until it is all coated. Split the chicken in half and put part of each pizza. Now it's ready for the oven! YAY!
Bake these for 15-20 minutes (just until the cheese turns golden brown) keep an eye on them though, don't want burnt pizza. So sad.

They should come out looking like this:


Cut with a pizza cutter or sharp knife and allow gleeful boyfriend to jump for joy and happy chow down.

As for me?

Bam.
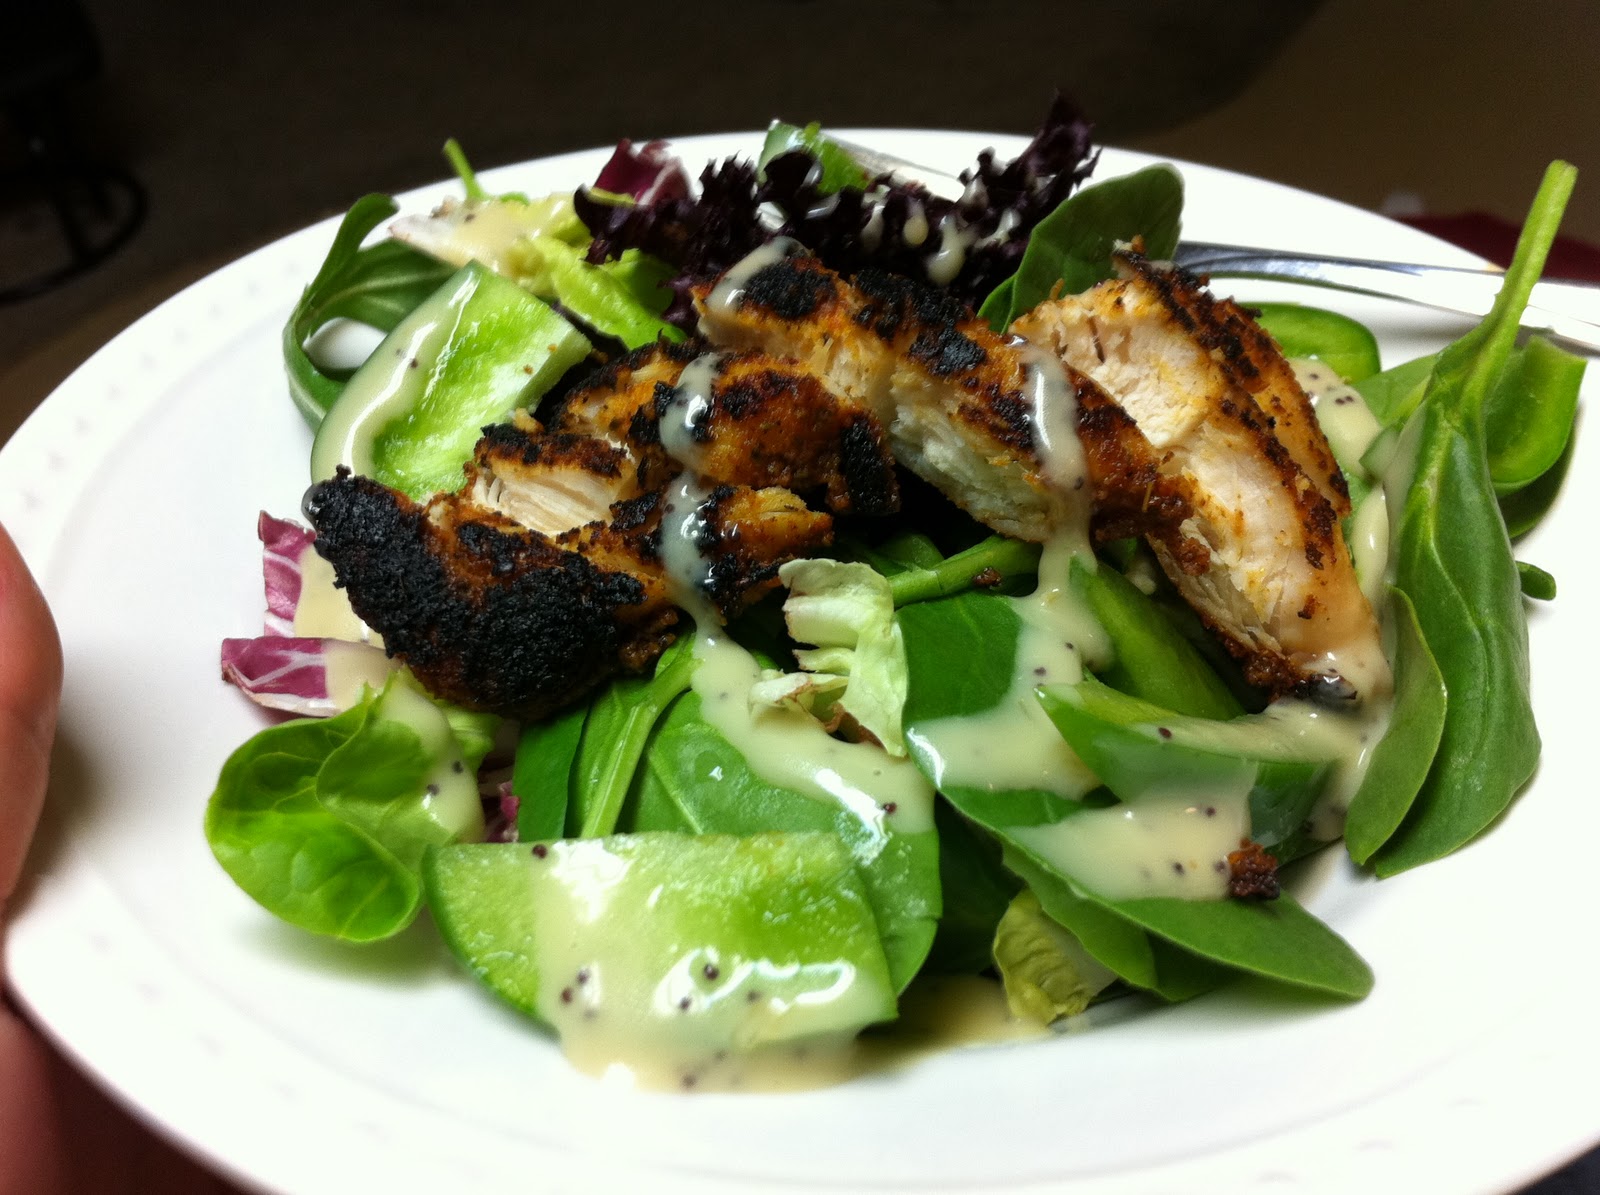
Salad wham-ey! I reserved a piece of chicken for myself, chopped it up, and tossed it with baby spinach, spring mix lettuce, poppyseed dressing, and some peppers and onions that I also reserved from the pizza. NOM.

Problem solved. Two very different meals that share some key ingredients. Another Sunday night dinner conquered.

Foodie Foodie!!

Thursday, December 16, 2010

I'm back!

Whew! Final are over, essays are written, and projects are finished! Hurray!
I promise you, I haven't been living off of fast food or frozen dinners... even in times of extreme all night studying, I still try my veerrry best to eat yum foodie foodie.

Often during my nights elbows-deep in textbooks, taking a break to make dinner is very entirely therapeutic.  Cooking has nothing to do with a 50 pound text book, it is driven my intuition (sometimes), and I feel almost immediate satisfaction from taking raw materials and turning it into something yum-licious.

Lately, I've been a little obsessed with using an oven. Putting something into a cooking vessel and popping it into the oven is kind of fun, it's almost a bit of a surprise when you open it up and find what the magic of the oven has produced.
So, here is a little something that I made in the midst of studying for my terrifying history of graphic design final.

Chicken and Veggies en Papillote 
This is chicken roasted in a parchment paper bag!  I had a lot of ingredients leftover from one of my previous meals (rosemary food coma...) so I found myself hoping to use an oven on them.. but I didn't want to use a dutch oven again! I wanted to try a different method. So, I took this approach that creates little individual servings! Here we go:

You'll need: (for 2 servings)
2 boneless skinless chicken breasts
1 zucchini
1/2 C. potatoes (rough chop)
1/2 C. mushrooms (rough chop)
1/2 onion, chopped
2 stalks of celery
2 large sheets of parchment paper
olive oil
garlic salt
pepper


Preheat the oven to 375º.
Chop the zucchini, potatoes, mushrooms, onion, and celery.
Do your very best to chop them into even sizes. The veggies will have a lot of interaction with steam in this cooking process, so it's good to roughly chop them on the larger side. Mine ended up being about 1/2" thick, but you can guesstimate. Put all of your chopped veggies into a bowl, and toss with a good amount of olive oil, garlic salt, and pepper. Now would be a good time to add any additional seasoning if you'd like. I wanted to keep it simple, but feel free to experiment. Rosemary, thyme, or even a little dried basil would be good if you care to try.
Next, get a cookie/baking sheet out, lay the parchment paper on top, and then put the chicken breast on top of that. Salt and pepper both sides liberally. Next, you'll pile some of the veggies on top of the chicken. Keep in mind, that you will eventually be making a little pouch out of this parchment paper, so try not to overload it too terribly much. Now, take two sides and lift them up to meet directly above the chicken/veggies. Fold the ends together two or three times, or just until it is secure. Then, take the other two open ends, and fold them underneath, so it'll look like this:


Woohoo! Good job...
Repeat this for the other servings (however many you choose to do). I ended up with extra veggies, so I made another little bag with just veggies. Now, just pop this into the oven and let it work its magic. 


Put this into the oven for 20–25 minutes, it all depends on your oven. Come to think of it, I think mine only stayed in there for about 18 minutes. Like I said, it all depends on your oven. After your waiting time is up, take the little yum-packets out of the oven, open up, and NOM NOM NOM NOOMM


well hello beautiful!


Foodie Foodie!


Thursday, December 2, 2010

Weeknight Dinner #3

Hello there nom-nomers!
I apologize for the absence of foodie foodie recipes lately, I've been very busy with school. Luckly the semester is almost over, so starting mid December, you'll be getting a lot more foodie foodie from me! (hopefully, at least)

So, I had a sudden realization the other day as I was stuffing my face with leftover turkey: I realized that during the holidays, people gain weight not just because of the feasts that ensue during Thanksgiving, Christmas (or Hanukkah or Kwanza or Winter Solstice) and New Years. We gain weight during the holiday season because in the days in between the big ones, we continue to stuff our faces like every day is a friggen holiday! We're in Thanksgiving mode from November 24th all the way to the New Year, when we make resolutions to drop all the weight that we just gained. So: I put my foot down and decided to make a Thanksgiving(ish) resolution: THIS YEAR, I WOULD MAINTAIN A HEALTHY AND BALANCED DIET THROUGHOUT THE HOLIDAYS. It's unhealthy to stuff your face to all oblivion, and just because the holiday season is full of sweet goodies, doesn't mean they should be the main component of our day-to-day diets. Don't get me wrong, I love gingerbread and hot chocolate even more than the next person, but I strongly believe in moderation.

So, in attempts to keep a balanced diet, I put together a little weeknight dinner that is low in fat/calories and high in yum yum yum oh-mah-god-that-was-good satisfaction:

Shrimp & Veggies with Warm Polenta
For those of you who aren't familiar with polenta, all you really need to know is that it is made up of ground up yellow corn, can be bought in several forms, and is magically delicious (not in the Lucky Charms kind of way...)

Also, for this recipe, I used frozen pre-cooked shrimp because I couldn't find any raw shrimp when I was at the store. I would recommend using raw, no-tail, and de-veined shrimp. just make sure that you cook the shrimp all the way through.


You'll need:
One pack of pre-cooked polenta
2 carrots
1 C chopped mushrooms
1 red onion, cut into slices
1 clove garlic
Shrimp (I estimated just about 1/2C–1C per person depending on how hungry you are)
1/2 C white wine (or chicken broth)
Olive oil
Salt and pepper

Chop up the carrots, mushrooms, onion, and garlic. Put a little olive oil into a saute pan over medium heat and toss in the onions and mushrooms. Salt and pepper liberally.

While that's cooking away, put a about an inch and a half of water into a pot to boil with a steamer insert. Cover and steam the carrots for a few minutes until they're just fork tender. Then, add them into the saute pan. Add the white wine, more salt and pepper, and garlic into the pan and let it reduce down.


Next, take either a grill pan or another saute pan and put it on over high heat. Put a teensy bit of olive oil into the pan and let it heat up. Open up the polenta and cut it into polenta-pucks (har har.) Mine were about 3/4" thick. Salt and pepper each side and place them into the hot pan. Let them cook on each side until they are nice and toasty golden brown on each side. 


While you're waiting for the polenta to brown, toss the shrimp into the pan with the veggies. Saute until they're warmed through (if you're using pre cooked, but if you're using raw shrimp, cook until they are pink and not raw inside.)
if you're using pre-cooked shrimp, be really careful not to overcook them


When the polenta is toasty on each side and the shrimp/veggies are all warm and yummy, plate them up and nom nom nom nom nom nom


I loved this meal because it is hearty without being heavy! Horray!

Foodie Foodie!

Wednesday, November 17, 2010

Weeknight Dinner #2

As I walked across campus from my night class in the freezing cold, shaking my fist at the air around me for being so frigid and at myself for forgetting my sweater, all I wanted was a bowl of hot deliciousness to combat the excruciating hypothermia.

Okay, maybe I'm exaggerating about the excruciating hypothermia, but it was very cold, and I was very grumpy...

When I got home, I realized that I just didn't have the patience to slow cook a stew for a few hours, and I certainly didn't want to spend that much time cooking when I really should be doing homework. SO: diving into my fridge I discovered a jar of tomato pasta sauce that I had used maaayybe 1/2 a cup from earlier this week.. and thought, "I should really use this."

This is the recipe that followed:

Quick, Healthy, Comfort-foody, Tomato-Stewed Chicken

You'll need:
olive oil
Garlic salt and pepper
1 onion (I used a white onion)
1 C chopped mushrooms
2 boneless skinless chicken breasts (This serves two people, but you can add more chicken if you're feeding more people!)
a 14.5 oz can of diced tomatoes
roughly 13 oz of tomato sauce from the jar (about half of the jar)
1 clove of garlic
2 TBS balsamic vinegar

Start by putting a nonstick pan onto the stove on about medium-high heat. Drizzle with olive oil, and while you're waiting for that to heat up, chop the onion into about 1" chunks or so. When the pan in good and hot, drop the onions in there and then salt and pepper liberally.

Then, clean and chop the mushrooms, and add them to the pan. Cook until the onions are translucent and the mushrooms are soft. Place this into a bowl and set aside.

Then, sprinkle the chicken breasts with salt and pepper, add more olive oil to the pan, and cook the chicken on both sides until it is brown is pretty much cooked through. I cooked them on medium-high for just about five minutes per side. It will continue to cook later during the "stewing" process, so don't worry too much. Then, open up the can of diced tomatoes and drain the extra liquid. Add this to the pan along with the half jar or tomato sauce. Then, add the onions and mushrooms you set aside earlier. Salt and pepper again! No bland-ness... ick. Let this simmer for a while, until the liquid reduces down. I let is stew there for about 20 minutes. If the liquid reduces TOO much, then simply add a bit more tomato sauce or even water. At this point you want to chop up the garlic and let it stew in there as well.
While this is stewing away.... you can work on the super simple and healthy side dish!


Super Simple and Healthy Side Dish: Roasted Carrots
Any excuse I can find to use my oven (to heat up my tiny apartment) is great. I saw a similar recipe for roasted carrots like this somewhere on the Food Network, so I decided to put a little spin on it.

You'll need:
5-10 carrots (just depends on how much you wanna make)
olive oil
Salt and pepper
1 tsp lemon juice
1/2 tsp dried dill

Preheat the oven to 400 (horray! Warm apartment!) Peel and chop the carrots (at a diagonal) and place them in a large bowl. Drizzle with olive oil, salt and pepper, dill, and lemon juice. Stir them all together so that all the carrots are all coated with the lovely flavors. Put them onto a baking sheet and place into the oven. Let them roast for about 20 minutes, but it could be more or less depending on the thickness of the carrots. When they are done roasting, they should be fork-tender and a bit browned around the edges. Yum yum

So, by the time the carrots are done roasting, your chicken should be perfectly stewed! Clever, huh? :P


Dish 'em up and enjoy! Nom nom nom.. hot healthy comfort food :]


foodie foodie!

Tuesday, November 9, 2010

Ready-Made Review

Soooo, as I've said before, I'm a college student. And though I certainly could allow you to entertain the illusion that I cook a delicious foodie foodie meal every night of the week, that's simply not the case. Sadly, your Foodie Foodie goddess does not have time to cook a meal from scratch every single night... though I certainly would love to!

Which leads me to tonight's topic: ready-made food. (gasp!)
I know, I know. Boxed food?! Frozen food?! Bah! How dare you?!

Before you throw a hissy fit, allow me to say that NOT ALL READY-MADE FOOD IS BAD. In fact, it can often be a saving grace for a girl like me who literally has minutes to spare in between classes, meetings, work, and internships.

Tonight was like many in my crazy schedule: no time to prepare anything to eat! So, do I run to the nearest fast food joint? No way. I reach for my handy-dandy frozen food selection. Please understand, that I do not take frozen food lightly. I do not eat hot pockets or any form of ...pocket. Nor do I eat boxed pastas or rice like Mac and Cheese (not because I dislike it, but because I will soon be spherical if I do eat it) The ready-made foods I do purchase must be nutritionally sound and, most importantly, tasty.

So here's tonight's ready-made food review:
Trader Joe's Chicken Shu Mai 

Dim Sum. Dim Sum. Say it with me. Dim sum. In a nutshell, Chinese breakfast consisting of little dumplings, buns, and other items of the like. Ultimately delicious. So when I saw the frozen Chicken Shu Mai (a common item in Dim Sum) I literally freaked out in the frozen isle, lunged at the freezer, and proceeded to checkout. I was a bit apprehensive because it seems that the frozen version of a beloved food tends to be sad and disappointing. But I decided to give it a try anyway!

I simply followed the instructions and steamed the little yum-nuggets in a steamer/pot with boiling water for about 6 or 7 minutes. Put that with a little soy sauce and sesame seeds and TA-DA!
A little dinner in less that 10 minutes. Bravo Trader Joes, bravo.


steamin away

And the taste? Admittedly, not as good as the fresh, delicious little dumplings that they cart around to you at the DimSum restaurants, but still quite tasty for a frozen food.  My rating? 8 out of 10 Generally good texture, but the little things lose heat very quickly... so it's either inhale them, or eat the lukewarm. They can, however, be microwaved. Hello new lunch in the studio!


Foodie Foodie!

Please note, that Yum Foodie Foodie does not request or accept any form of compensation or payment for product reviews.

Wednesday, November 3, 2010

Weeknight Dinner #1

Well hello everyone! I am excited to see I have a few followers! very very exciting.

nummmm num

So, for the next foodie foodie entry, it's all about the weeknight dinner. We are all busy, especially those of us down at IMC (all my design-y friends, you know what I mean...) and hot dogs and pizza can only take us so far... once in a while we need something wholesome. I apologize for the terrible lighting in my photos. Flourecent lighting isn't flattering... even to chicken. My iPhone and I are very sorry :P

So here it is: Weeknight dinner #1

Grilled Chicken with Roasted Asparagus
simple? YES! easy? that too.

For the asparagus you'll need:
One bunch of asparagus
Olive oil
Garlic salt
pepper

Really easy guys. Wash the asparagus and snap off the woody parts on the bottom of the stalks. Those get really tough so you won't want to eat them. Set your oven to 325° and let it warm up (very nice for girls like me who's heaters don't work in their apartments and it is very chilly outside!) Place the asparagus onto a cookie sheet or baking dish and drizzle with olive oil. Then add the garlic salt and pepper (I like a lot of garlic salt, but that's just me.)

sprinkle with olive oil, garlic salt, and pepper
Place those suckers in the oven and let them do their tasty thing for 15-20 minutes. Depending on how hot your oven actually runs, and how mushy or firm you like your roasted veggies, they should be done within that time. I typically let them roast until they're fork-tender and then they're good to go!

doin their thang


Grilled Chicken
I love making this grilled chicken recipe... even though I don't use a real grill outdoors or anything... this is where my friend the cast iron grill pan comes in. Horrah for grilling indoors! The rub on this chicken tastes uber yummy.. and I think the combination of cinnamon and mustard is really good. Just a little note: do not fear the liquid smoke! It is the outdoor summer BBQ in a bottle... utter magic. Don't overdo it though, because the flavor can be a bit overpowering.
Anyway, read on yum-seekers.

You'll need:
2 boneless skinless chicken breasts (one breast per person)
2 tsp cinnamon
1 tps garlic salt
1/2 tps pepper
a dash of dried dill
3 tbs coarse ground dijon mustard
1/2-1tsp liquid smoke

Put the cinnamon, garlic salt, pepper, and dill into a large zip top plastic bag.  Then place the chicken into the bag, seal it, and mush it around to cover all of the dry ingredients onto the chicken breast.

Let that chill out in the fridge for a few minutes. Then, add the mustard and the liquid smoke into the bag. Take our your handy-dandy cast iron grill pan and put it onto the stove over high heat.

Let it get nice and hot so you can get some great grill marks on your chicken. When the grill pan is hot, place the chicken breasts onto it- and don't mess with them. If you keep screwing with them, you'll ruin the grill marks which are very nice and impressive!
flip it!

yummmm

Turn down the heat to medium-high or even down to medium and cook the chicken until it has nice grill marks and is cooked through. Enjoy!

there it is!


So there you have it, a lovely little healthy meal for the weeknight. This normally takes me about 30 minutes if I time everything right and multi-task. I like making this because the asparagus is super healthy, and the chicken has some really interesting flavors going on there (not the boring salt and pepper deal.) Because this is a little skimpy for my calorie-furnace boyfriend, I like to sneak a little buttered brown rice onto his plate if he's eating with me that night (just follow the rice cooking instructions on the bag, then add butter and salt and pepper.) You know... a little carb action. Hope you enjoyed!


Foodie foodie!


ps
If you have ANY comments or questions, don't be shy! Drop me a comment :)